
All of floss tags that I made this week were "rounded". I did not use any iron on fusible web. I used a very light weighted cardboard. Here are the front and back of the pieces:

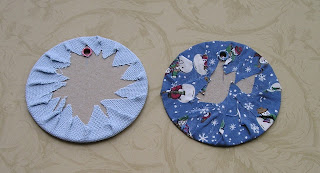
I used one eyelet for the front piece and another eyelet for the back piece. I intentioinally picked 2 different eyelet colors for the front and back. I whipped the 2 pieces together matching the top eyelets and then put pins and ribbon trims around the finished piece:


Ok, there are reasons why I used 2 eyelets in one floss ring tag. First of all one eyelet is not deep enough to go through 2 layers of fabric and 2 layers of cardboards. Second, the eyelets always look the best on the top part, but the bottom part may not always look as good. So when I used 2 eyelets you always have the best result and the not so perfect parts are hidden.
The cheapest tool to make this is the eyelet tool kits, the sizes are 5/32" and 1/4", the instruction are very clear as far as how to set the eyelets: (I do carry these on my web site)


These are the eyelet packages for 5/32" and 1/4"


Other supplies that you will need is a thread ring, they come in different sizes, here is an example of 2", 1 1/2", 1 inches rings:

Don't forget about the thread drops :
 So you have tried out the eyelet kits and have made a few Floss Ring Tag, now you want to
There is another tool for Scrapbooking that you can use as well, it is called "crop-a-dile". It will set 1/8" and 3/16" eyelets. If you are using this tool to make floss ring tag, you need 3/16" eyelets, the 1/8" eyelets are too small to fit the round ring. Another important information to know is you can't use 5/32" and 1/4" eyelets with this tool. It is about $29.99 pluse sales tax.

Here are the 3/16" scrapbook eyelets that I carry on my web site. There are more eyelet choices with scrapbook eyelets as far as shapes and colors. If the demand is good, I will carry more variety.

Are you ready to make some now with all the information????????
